–
153 KB – 63 Pages
PAGE – 1 ============
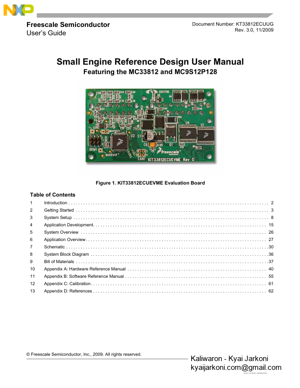
© Freescale Semiconductor, In c., 2009. All rights reserved. Freescale SemiconductorUser™s GuideDocument Number: KT33812ECUUGRev. 3.0, 11/2009 Small Engine Reference Design User ManualFeaturing the MC33812 and MC9S12P128Figure 1. KIT33812ECUEVME Evaluation Board Table of Contents 1Introduction . . . . . . . . . . . . . . . . . . . . . . . . . . . . . . . . . . . . . . . . . . . . . . . . . . . . . . . . . . . . . . . . . . . . . . . . . . . . . . . . . . 2 2Getting Started . . . . . . . . . . . . . . . . . . . . . . . . . . . . . . . . . . . . . . . . . . . . . . . . . . . . . . . . . . . . . . . . . . . . . . . . . . . . . . . 3 3System Setup . . . . . . . . . . . . . . . . . . . . . . . . . . . . . . . . . . . . . . . . . . . . . . . . . . . . . . . . . . . . . . . . . . . . . . . . . . . . . . . . 8 4Application Development. . . . . . . . . . . . . . . . . . . . . . . . . . . . . . . . . . . . . . . . . . . . . . . . . . . . . . . . . . . . . . . . . . . . . . . 15 5System Overview . . . . . . . . . . . . . . . . . . . . . . . . . . . . . . . . . . . . . . . . . . . . . . . . . . . . . . . . . . . . . . . . . . . . . . . . . . . . 26 6Application Overview. . . . . . . . . . . . . . . . . . . . . . . . . . . . . . . . . . . . . . . . . . . . . . . . . . . . . . . . . . . . . . . . . . . . . . . . . . 27 7Schematic . . . . . . . . . . . . . . . . . . . . . . . . . . . . . . . . . . . . . . . . . . . . . . . . . . . . . . . . . . . . . . . . . . . . . . . . . . . . . . . . . . .30 8System Block Diagram . . . . . . . . . . . . . . . . . . . . . . . . . . . . . . . . . . . . . . . . . . . . . . . . . . . . . . . . . . . . . . . . . . . . . . . . .36 9Bill of Materials . . . . . . . . . . . . . . . . . . . . . . . . . . . . . . . . . . . . . . . . . . . . . . . . . . . . . . . . . . . . . . . . . . . . . . . . . . . . . . .37 10Appendix A: Hardware Reference Manual . . . . . . . . . . . . . . . . . . . . . . . . . . . . . . . . . . . . . . . . . . . . . . . . . . . . . . . . . 40 11Appendix B: Software Reference Manual. . . . . . . . . . . . . . . . . . . . . . . . . . . . . . . . . . . . . . . . . . . . . . . . . . . . . . . . . . 55 12Appendix C: Calibration. . . . . . . . . . . . . . . . . . . . . . . . . . . . . . . . . . . . . . . . . . . . . . . . . . . . . . . . . . . . . . . . . . . . . . . . 61 13Appendix D: References. . . . . . . . . . . . . . . . . . . . . . . . . . . . . . . . . . . . . . . . . . . . . . . . . . . . . . . . . . . . . . . . . . . . . . . 62
PAGE – 2 ============
Small Engine Reference Design User Manual , Rev. 3.0 2Freescale Semiconductor Introduction 1Introduction Welcome to the Freescale Small Engine Reference Design Kit. This product was designed to be a complete solution for the electronic control of a small engine. Small engines are defined as a one or two cylinder engine for use in anything from a motorbike to a lawn mower to a generator. While the decision was made to address a one-cylinder engine specifically , this design is extremely useful for a two-cylinder engine with little or no modification. Freescale’s conc ept of creating an engine control kit is intended to enable a market ranging from garage hobbyist to seasoned Tier 1 Powertrain Engineer using Freescale products. Through the use of this kit, you can create an engi ne controller specific to a small engine application. Engine control is a discipline that requires intimate knowledge and experience in Chemical, Mechanical, and Electrical Engineering. For those familiar with mechanical contro l of an engine th rough a carburetor, the use of this reference design kit can help to advanc e your knowledge in the electrical area and provide a jump-start for a successful adoption of electrical engine controls to meet new emissions standards. Providing a kit such as this is intended to make se miconductor products from Freescale easier to use. The user is responsible for providing all input sign als, output loads as well as the completed system design and development. This kit should serve as a starting point for the development of an application specific engine controller for a small engine. Example software and documentation are provided to assist in successful design and implementation. It is recomm ended to have the follo wing skills and experience: embedded C-language programming, analog and di gital circuit design and schematic analysis, microcontroller programming, fuel injection syst em debugging and calibration, and engine test environment experience. Additionally, there is furt her benefit to experience using the CodeWarrior Development Studio and the Freescale S12(X) mi crocontroller Units (MCU s). The User Reference Manual provides exercises and refe rences to additional information to reduce the learning curve for inexperienced users. Freescale’s goal is to enable the small engine market. To clarify this point, the hardware included in this kit can readily be configured and reprogrammed to ru n an engine. However, it lacks the application specific hardening (EMC, ESD, and environmental ar eas for example) and implementation optimization that make it a production ready module for any specif ic application. Further, th e free example application software provided is a starting point capable of runn ing an engine. It does not apply any advanced control strategy capable of addressing the pollution concerns and regulations facing the small engine industry. To do this would become application specific to an engine and could not be and should not be implemented by a semiconductor supplier as it is deeply outside their area of expertise. The example application software does show how to use the key func tionality in the Freescale products that the kit is based on, which speeds up the development process by showing a working example. The contents of this kit will save many months of work, even for expe rienced powertrain engineers just looking to evaluate Freescale products. A system has been created based on a one-cylinder closed-loop engine controller using integrated technology while being cost-effective for the small engine market. Example software is provided that can be customized to run an actual engine that has electronic fuel injection. Documentation is provided to aid in goi ng through the process of developing an application. Finally, information on modifying the design to support the adaptation of the small engine reference design to your application goals.
PAGE – 3 ============
Small Engine Reference Design User Manual , Rev. 3.0 Freescale Semiconductor3Getting Started2Getting Started 2.1Exploring the Contents of KIT33812ECUEVME Included in this kit are the essential components to develop an engine control application for small engines. Development is centered on the use of a Windows based PC and the Electronic Control Unit (ECU) contained in this kit. Figure 2 shows a picture of the key kit contents. The key components of the kit are: ECU, wire harness, documentation DVD, Fr eescale CodeWarrior for the S12(X) (contained on DVD), USB BDM Tool, and USB cable. Please refer to the packing list for any additional components that may be included in the kit. If contents are missing, use the included warranty card or contact your local Freescale Support Team. Figure 2. Contents of Kit KIT33812ECUEVME Your Engine Software Development on PC USB Connection to ECU Wire harness for connection to EFI System Documentation DVD Including CodeWarrior and example application code Small Engine ECU
PAGE – 4 ============
Small Engine Reference Design User Manual , Rev. 3.0 4Freescale Semiconductor Getting Started 2.2Electronic Control Unit (ECU) This is the Small Engine Referenc e Design hardware. It is a one-cylinder engine controller based on the Freescale MC9S12P128 microcontroller, MC33812 Small Engine Integrated Circuit, and MC33880 Configurable Octal Serial Swit ch. The unit will run from a 12 V battery and control engine loads such as a fuel injector, inductive ignition co il, relays, incandescent lamps, an d LEDs. The ECU also takes inputs from switches and sensors, such as Engine Stop switch, manifold air pressure, engine temperature, and variable reluctance sensors. Applicat ion software will be run on this uni t containing your engine control strategy. While the unit is not designed to be a produc tion module specific to any engine, it is intended to have the same look and feel. This resulted the sm all, business card sized form factor and minimal provision for expansion. Figure 3. ECU Included in KIT33812ECUEVME
PAGE – 5 ============
Small Engine Reference Design User Manual , Rev. 3.0 Freescale Semiconductor5Getting Started2.3ECU Wire Harness To provide a physical connection to the electronic fuel injection system, a wired connection to the controls and sensors of the system is required. As a starting po int, a basic wire harness is included in the kit along with the components to fully populate the connectors. The basic wire harness allows power to be applied to the module and a minimal set of loads. Later in this manual, there is docume ntation that will discuss the process of interfacing the signals of the engine to the ECU. Addition connectors can be easily obtained through known electronic component supplie s. Exact part numbers are made available in the bill of materials (BOM) for the ECU. Figure 4. ECU Wiring Harness 2.4Documentation DVD/CD The documentation media contains electr onic copies of all relevant information for creating and using this kit, including this User Manual. Documentation includes various support tools, such as spreadsheet tools, and design files including schematics and Gerber out put files. These can be accessed through the graphical application that is autom atically launched or by using Wind ows Explorer as a more direct navigation of the contents. As info rmation may be updated, always reference www.freescale.com for the latest relevant information.Figure 5. Small Engine Reference Design Documentation DVD/CD
PAGE – 6 ============
Small Engine Reference Design User Manual , Rev. 3.0 6Freescale Semiconductor Getting Started 2.5Freescale CodeWarrior for the S12(X) All software for the ECU is developed using this applic ation, which is included on the DVD. This is done as a convenience as it is a large program to downlo ad. It is recommended to check for the latest version and updates at www.freesc ale.com. Example software is tested using the 5.0 release of the S12(X) product. This version does not require any updates or patches at the time development, however it is recommended to maintain this software through updates as available. The CodeWarrior Development Studio is an integrated development environment t hat provides a common interface for working with the various tools needed for building software. It comes in various levels of product for various types of MCUs. The example software allows the use of the Spec ial Edition Product which is free for use. As your application grows and further features of the prod uct are required, upgraded licenses can be purchased to meet your needs. The primary function of the CodeWarrior application is to compile software, program the ECU, and then control the execution of the software through the integrated debugger. Figure 6. Screen shot of Freescale CodeWarrior for the S12(X)
PAGE – 8 ============
Small Engine Reference Design User Manual , Rev. 3.0 8Freescale Semiconductor System Setup 3System Setup Now that the contents of the small engine reference design have been describ ed, the focus will shift to the complete developmen t system. This includes the contents of this kit and the fuel injected engine as a system. At a high level, system setup contains the following steps: ŁDefinition of interface between ECU and Engine ŁCreation of simulated engine environment ŁInstallation and verification of software development environment ŁEngine load and sensor validation ŁMigration plan towards real engine hardware To accomplish these steps, several exercises will be described to help take you through this critical phase. These exercises include, getting started wit h Freescale CodeWarrior, and creating a known reference system. Additionally, sugg estions for further training will be provided based on using Freescale products and the system level setup. Figure 2 shows the components of this kit and a placeholder for your engine. This system incorporates the interface from the PC to the actual engine. The user must provide the engine loads for electronic fuel injection in cluding fuel injector, induct ive ignition coil, relays, and other relevant components. Signals from VRS, MAP, switches, and other inputs must also be provided along with the actual engine itself. 3.1Definition of interface between ECU and Engine The first step in using this kit is to determine how it will connect to your engine system. As mentioned, the engine must be fuel injected. If you are converting an engine from mechanical (carburetor) to electronic control, this must be done before or in parallel with using this kit. The ECU is designed around a one-cylinder engine, however, it can be adapted to work with a two-cylinder engine. The requirements for two-cylinder operation are: a) ignition coil must be a du al output or twin coil, b) wasted-spark strategy is acceptable for application. This means that a twin co il, capable of driving two separate spark plugs from a single input, can be used to fire every engine revo lution (in a four-stroke engine) to produce two spark events, one in the desired cylinder and one in the second (wasted) cylinder. If this can be tolerated in the system, fuel control can be provided individually to each cylinder through the INJOUT and ROUT1 signals. To aid in the connection from the ECU to the engine, a worksheet is provided. Using Load Worksheet.xls, available on the documentation DVD, connection to th e engine can be defined. This Excel spreadsheet contains the full list of connections and suggested func tionality for each pin of the ECU. Matching up the various controls, sensors, and inputs on the engine to the ECU should take into account voltage ranges and current capabilities. If there is doubt to the connection, us e the schematic and Hardware Design Reference Manual found in Appendix A to for in-depth analysis of the circuits behind each ECU level pin. The design goal of a cost-efficient design does not allow for a system to include all possible system configurations. The signals available reflect esse ntial controls for one-cylinder, closed-loop engine control, highlighting the integration of the MC33812 Small Engine IC. Essential functionality should be considered first, such as the direct c ontrols for fuel and spark. System controls such as the fuel pump or voltage regulator should be secondary concern as they can be externally controlled and do not require precise timing execution.
PAGE – 9 ============
Small Engine Reference Design User Manual , Rev. 3.0 Freescale Semiconductor9System Setup By filling in the information un der the fiTarget Engine Systemfl column, see yellow highlight in Engine Load Worksheet – Target System Identification Column in Yellow , each connection to the ECU can be defined. In the actual worksheet, signals of the ECU are colo r coded to identify similar functionality. From this completed worksheet, the wire harness from the engi ne to the ECU can be made. Materials for the AMP brand connectors of the ECU are in cluded to get this process started. Exercise 1: Complete the Load Work sheet for your target engine system. 1.Open fiLoad Worksheet.xlsfl and bring the fiInstruction sfl sheet to the front by clicking on this tab. 2.Collect information such as wiring diagrams and schematics for the engine system to be run. 3.Use the engine system information to defin e how each signal of the ECU is goi ng to be connected to the engine. This includes a definition of an existing pin on a connector, wire color and type, and the functionality associated with the system. This table will also be useful for configuring the software. 4.Repeat this exercise for creating a simulated engine environment. Creation of simulated engine environment Before the simulated environment can be created, the ECU must have a viable power source. As the ECU is designed to work in a real engine system, it is requ ired to have a 12 V power source. A power supply capable of generating 12 V at 1.0 A is a good starting point for the ECU alone. Depending on the loads that will be connected to the ECU, a much larger power suppl y may be required with high current. A good starting point for working with a full featured system is a 12 V, 10 A power supply. While the total system loads may be greater, 10 A is generally large enough since the high current loads of ignition and injectors are not typically on simultaneously. Engine Load Worksheet – Target Syst em Identification Column in Yellow KIT33812ECUEVME Reference Design Target Engine System Connector PinSignal NameSignal Type Voltage Range Recommended Functionality Connector Pin Wire Color Functional Description 1VPWRPower Input 13.6VSystem power from 12V battery 2ISO9141Input / Output0-VbatBi-directional com- munication pin for diagnostics3COIL0-VbatSpark control of digital ignition sys- tem4GND0VModule level ground reference, return path of Vbat 5GND0VModule level ground reference, return path of Vbat 6TPMD0-VbatH-bridge control for 4-phase step- per motor for idle speed air speed control
PAGE – 10 ============
Small Engine Reference Design User Manual , Rev. 3.0 10Freescale Semiconductor System Setup The best and safest way to begin developing an applic ation for engine control is to work with a simulated engine system. This reduces risk and development time by not having to focus on fuel related safety concerns when trying to solve complex applications issues that arise. Developing with a simulated engine system engine begins by selecting components that are similar or identical to the actual components on the engine. For many of the loads, these can be the exact same compo nents. In some cases, loads can be replaced by a lesser expensive relay or a light. Relays work well for high power loads with dynamic operating frequencies such as ignition and injectors. In those cases, the sound of the relay actuation is beneficial to validate behavior during low speed testing. Other loads work better with lights or LEDs. These are more simple loads that are simply controlled as on or off for long periods of time. Some loads will require the actual load to test , such as an id le speed motor. Perhaps the most challenging part of the system to simulate is engine position. Two core technologies are used to sense engine position: variable reluct ance sensors (VRS) and Hall Effect sensors. The majority of production engines use a VRS for engine position. The advantage with the VRS is cost, while a Hall Effect sensor provides a cleaner output sign al. Both types are supported on the ECU. The default configuration is for VRS. Use the schematic to identify the components to remove and populate for using a Hall Effect sensor. With respect to creating a simulated engine envir onment, engine position is the fundamental element. Simulating the rotation of the engine can be done in two ways, virtual and physical simulation. A virtual simulation involves a digital re-creation of the spinning crankshaft signal. This is best done by reproducing a Hall Effect Sensor type of output, but there are opti ons for a VRS. Using a different ECU, such as a basic development board for a Freescale MCU, softwa re can be written to create a the missing tooth output pattern that is produced by a rotating engi ne using a Hall Effect Sensor. Such programs have already been written for varying degrees of Freescale MCUs. The TOOTHGEN function is a part of a library of functions for the MPC55xx products that ha ve the eTPU peripheral.(ref1) Using a development tool for such a product can allow the creation of a simulated engine position si gnal. For a VRS, options for a virtual simulation include a co mbination of PC software with simple custom hardware. Do it yourself (DIY) web sites, such as those for the Mega Squirt pr oducts, provide detailed instructions for building your own circuit and provide PC software that can control the generation of the VRS signal based on a simulated signal. (ref2) While the concept of a virtual simula ted engine position signal is very attractive, it lacks fundamental characteristics that come with actual crankshaft of an engine. Since a vi rtual signal is typically generated by a digital computer, it usually does not account for the real world imperfections of an engine. Specifically, the timing pulses produced by a virtual si gnal are perfect. While this is a good on paper or visually on a screen, the imperfections in the motion due to production tolera nce and jerk associated with cylinder compression lead to a rotation pattern that is not perfect. As a step in the right direction, a physical simulated engine position si gnal can be used. This type of setup can take advantage of VRS or Hall Effect Sensors and produce a signal that has more realistic characteristics to a real engine. A simple and effective way to make a physical simulation is to mount an engine flywheel containing the position teeth to a small electric motor. This creates a tool k nown as a spin bench. Using an electric motor and the actual flywheel allows simple control of the engine speed while adding real world conditions for changes in the actual time between position teeth. While the strong variations related to compression and combustion are not present, the spin bench does allow transitions to and from a stopped engine and provide teeth that are representative of the actual engine that the application is being developed for. Figure 8 shows an example of a spin bench using a produ ction flywheel and VRS from a small motorbike.
PAGE – 11 ============
Small Engine Reference Design User Manual , Rev. 3.0 Freescale Semiconductor11System Setup Figure 8. Spin Bench Example for Creating a Physical Simulated En gine Position Signal Exercise 2: Creating a reference platform for a simulated engine environment 1.Open Load Worksheet.xls and bring the fiRefer ence System Load Worksheetfl to the front. 2.Obtain components listed. Generic co mponent specificat ions are listed. 3.Additionally, a simulation for engine position will be required . Create this using any of the examples described in this section. Verify the simulated engine position signal is being properly generated. For this reference platform to work, a 12 minus 1 signal must be generated. This means 12 equally spaced t eeth with one missing tooth representing a gap. See Figure 9 for oscilloscope trace of 12 minus 1 signal. 4.Create a wire harness to connect reference components to the ECU. Include specifications of wire color and pin number as applicable. This will aid in debugging and later development. 5.Connect the wire ha rness to the ECU. 6.Place the Engine Stop Switch in the active position, which is a short to ground. 7.Apply power. Verify connections are correct by noting that power supply is drawing less than 500mA of current and no components of the ECU are generating large amount s of heat. If any component is hot, remove power and verify connections. 8.Verify that no relays should be active. This should be audible when power is applied if a relay was activated. If relay activates on power on, verify Engine Stop Switch position and relay connections.
153 KB – 63 Pages