How CPR Works. The air we breathe in travels to our lungs where oxygen is picked up by our blood and then pumped by the heart to our tissue and organs.
11 pages
162 KB – 11 Pages
PAGE – 1 ============
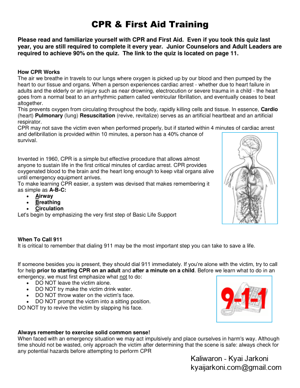
CPR & First Aid Training Please read and familiarize yourself with CPR and First Aid. Even if you took this quiz last year, you are still required to complete it every year. Junior Counselors and Adult Leaders are required to achieve 90% on the quiz. The link to the quiz is located on page 1 1 . How CPR Works The air we breathe in travels to our lungs where oxygen is picked up by our blood and then pumped by the heart to our tissue and organs. When a person experiences cardiac arrest – whether due to h eart failure in adults and the elderly or an injury such as near drowning, electrocution or severe trauma in a child – the heart goes from a normal beat to an arrhythmic pattern called ventricular fibrillation, and eventually ceases to beat altogether. Th is prevents oxygen from circulating throughout the body, rapidly killing cells and tissue. In essence, Cardio (heart) Pulmonary (lung) Resuscitation (revive, revitalize) serves as an artificial heartbeat and an artificial respirator. CPR may not save the victim even when performed properly, but if started within 4 minutes of cardiac arrest and defibrillation is provided within 10 minutes, a person has a 40% chance of survival. Invented in 1960, CPR is a simple but effective procedur e that allows almost anyone to sustain life in the first critical minutes of cardiac arrest. CPR provides oxygenated blood to the brain and the heart long enough to keep vital organs alive until emergency equipment arrives. To make learning CPR easier, a system was devised that makes remembering it as simple as A – B – C: A irway B reathing C irculation Let’s begin by emphasizing the very first step of Basic Life Support When To Call 911 It is critical to remember that dialing 911 may be the most important step you can take to save a life. for help prior to starting CPR on an adult and after a minute on a child . Before we learn what to do in an emergency, we must first emphasize what not to do: DO NOT leave the victim alone. DO NOT try make the victim drink water. DO NOT throw water on the victim’s face. DO NOT prompt the victim into a sitting position. DO NOT try to revive the victim by slapping his face. Always remember to exercise solid common sense! When faced with an emergency situation we may act impulsively and place ourselves in harm’s way. Although time should not be was ted, only approach the victim after determining that the scene is safe: always check for any potential hazards before attempting to perform CPR
PAGE – 2 ============
Adult CPR American Heart Association’s guidelines dictate that Adult CPR is performed on any person over the age of 8. The procedure outlined in the following lessons is similar to Children CPR and Infant CPR, although some critical differences apply. Before you start any rescue efforts, you must remember to c heck the victim for responsiveness . If you suspect that the victim has sustained spinal or neck injury, do not move or shake him. Otherwise, shake the victim gently and shout “Are you okay?” to see if there is any response. If the victim is someone you know, call out his name as you shake hi m. If there is no response, immediately dial 9 – 1 – 1 and check the airway AIRWAY “A” is for AIRWAY. If the victim is unconscious and is unresponsive, you need to make sure that his airway is clear of any obstructions. The breaths may be faint and shallow – look, listen and feel for any signs of breathing. If you determine that the victim is not breathing, then something may be blocking his air passage. The tongue is the most common airway obstructio n in an unconscious person. With the victim lying flat on his back, place your hand on his forehead and your other hand under the tip of the chin (Figure 1). Gently tilt the victim’s head backward. In this position the weight of the tongue will force it to shift away from the back of the throat, opening the airway (Figure 2). If the person is still not breathing on his own after the airway has been cleared, you will have to assist him breathing BREATHING “B” is for BREATHIN G. With the victim’s airway clear of any obstructions, gently support his chin so as to keep it lifted up and the head tilted back. Pinch his nose with your fingertips to prevent air from escaping once you begin to ventilate and place your mouth over the v ictim’s, creating a tight seal (Figure 1). As you assist the person in breathing, keep an eye on his chest. Try not to over – inflate the victim’s lungs as this may force air into the stomach, causing him to vomit. If this happens, turn the person’s head to the side and sweep any obstructions out of the mouth before proceeding. Give two full breaths. Between each breath allow the victim’s lungs to relax – place your ear near his mouth and listen for air to escape and watch the chest fall as the victim exha les (Figure 2). If the victim remains unresponsive (no breathing, coughing or moving), check his circulation CIRCULATION “C” is for CIRCULATION. In order to determine if the victim’s heart is beating, place two fingertips on his carotid artery, located in the depression between the windpipe and the neck muscles (Figure 1), and apply slight pressure for several seconds. If ther e is no pulse then the victim’s heart is not beating, and you will have to perform chest compressions
PAGE – 3 ============
COMPRESSIONS When performing chest compressions, proper hand placement is very important. To loc ate the correct hand position place two fingers at the sternum (the spot where the lower ribs meet) then put the heel of your other hand next to your fingers (Figure 1). Place one hand on top of the other and interlace the fingers (Figure 2). Lock your compressions should be approximately 1½ to 2 inches – remember: 2 hands, 2 inches (Figure 3). If you feel or hear slight cracking sound, you may be pressing too hard. Do not become alarmed and do not stop your rescue efforts! Damaged cartilage or cracked ribs are far less serious than a lost life. Simply apply less pressure as you continue compress ions. Count aloud as you compress 30 times at the rate of about 3 compressions for every 2 seconds. Finish the cycle by giving the victim 2 breaths. This process should be performed four times – 30 compressions and 2 breaths – after which remember to ch eck the victim’s carotid artery for pulse and any signs of consciousness. If there is no pulse, continue performing 30 compressions/2 breaths, checking for pulse after every 4 cycles until help arrives. I f you feel a pulse (i.e. the victim’s heart is beating) but the victim is still not breathing, rescue breaths should be administered, one rescue breath every five seconds (remember to pinch the nose to prevent air from escaping). After the first rescue bre ath, count five seconds and if the victim does not take a breath on his own, give another rescue breath. Let’s review Adult CPR Review In case of an emergency you may be the victim’s only chance of survival. Until an ambulance arrives and professional assistance is available, you can increase that chance by 40% simply by remembering and effectively administering Cardio Pulmonary Resuscita tion. 1. Check for responsiveness by shouting and shaking the victim. Do not shake or move the victim if you suspect he may have sustained spinal injury. 2. Call 9 – 1 – 1. 3. Remember your A – B – C: A irway: tilt the head back and lift the neck to clear the a irway. B reathing: pinch the victim’s nose and give 2 breaths, watching for the chest to rise with each breath. C irculation: if there is no pulse, perform 30 chest compressions – 2 hands, 2 inches. 4. Check for pulse and if necessary perform the cycle ag ain. Ch ild CPR According to the American Heart Association’s guidelines Child CPR is administered to any victim under the age of 8. Although some of the material in the next lesson may seem repetitive, we strongly recommend that you do not skip ahead as there are crucial distinctions that apply to children’s rescue efforts. The first thing to remember about Child CPR is this: in children cardiac arrest is rarely caused by heart failure but rather by an injury such as poisoning, smoke inhalation, or head trauma, which ca uses the breathing to stop first. And since children are more resilient than adults statistics have shown that they tend to respond to CPR much better if administered as soon as possible. If the child is unresponsive and you are alone with him, start res cue efforts immediately and perform CPR for at least 1 to 2 minutes before dialing 9 – 1 – 1. Before you call an ambulance, immediately check the victim for
PAGE – 4 ============
responsiveness by gently shaking the child and shouting, “Are you okay?” DO NOT shake the child if you suspect he may have suffered a spinal injury. If the child is clearly unconscious, remember your A – B – C and check the child’s airway AIRWAY “A” is for AIRWAY. A child’s breaths may be extremely faint and shallow – look, listen and feel for any signs of breathing. If there are none, the tongue may be obstructing the airway and preventing the child from breathing on his own. Exercise extra caut ion when you open the victim’s air passage using the head tilt/chin lift technique (Figure 1). This will shift the tongue away from the airway. If the child is still not breathing after his airway has been cleared, you will have to assist him in breathing BREATHING “B” is for BREATHING. If the child remains unresponsive and still not breathing on his own, pinch his nose with your fingertips or cover his mouth and nose with your mouth creati ng a tight seal, and give two breaths (Figure 1). Keep in mind that children’s lungs have much smaller capacity than those of adults. When ventilating a child, be sure to use shallower breaths and keep an eye on the victim’s chest to prevent stomach diste ntion If this happens and the child vomits, turn his head sideways and sweep all obstructions out of the mouth before proceeding. After you’ve administered the child two breaths and he remains unresponsive (no breathing, coughing or moving), check his circulation CIRCULATION “C” is for CIRCULATION. Check the child’s carotid artery for pulse by placing two fingertips and applying slight pressure on his carotid artery for 5 to 10 seconds. If don’t feel a pulse then the victim’s heart is not beating, and you will have to perform chest compressions COMPRESSIONS When performing chest compressions on a child proper hand placement is even more crucial than with adults. Place two fingers at the sternum (the bottom of the rib cage where the lower ribs meet) and then put the heel of your other hand directly on top of y our fingers (Figure 1). A child’s smaller and more fragile body requires less pressure when performing compressions. The rule to remember is 1 hand, 1 inch . If you feel or hear slight cracking sound, you may be pressing too hard. Apply less pressure as yo u continue. Count aloud as you compress 30 times, followed by 2 breaths. Perform 5 cycles of 30 compressions and 2 breaths before checking the child for breathing and pulse. victim’s carotid artery for pulse as well as any signs of consciousness. DO NOT FORGET TO DIAL 9 – 1 – 1. Let’s review
PAGE – 5 ============
Child CPR Review Children’s CPR is given to anyone under the age of 8. The procedure is similar to that for adults with some minor but important differences. 1. Check for responsiveness by shouting and shaking the victim. Do NOT shake the child if he has sustained a spinal injury. 2. Remember your A – B – C: A irway: tilt the head back and lift the neck to clear the airway. B reathing: pinch the child’s nose or c over his mouth and nose with your mouth making a tight seal, and give two breaths, watching for the chest to rise with each breath. C irculation: if there is no pulse, administer 30 chest compressions – 1 hand, 1 inch. 3. Continue to perform CPR for 1 to 2 minutes before dialing 9 – 1 – 1. 4. Check for pulse and if necessary perform the cycle again, checking for pulse every minute. Infant CPR According to generally accepted guidelines, Infant CPR is administered to any victim under the age of 12 months. Infants, just as children, have a much better chance of survival if CPR is performed immediately. If you are alone with the infant, do not dial 9 – 1 – 1 until after you have made an attempt to resuscitate the victim. Check the infant for responsiveness by pa tting his feet and gently tapping his chest or shoulders. If he does not react (stirring, crying, etc.), immediately check his airway AIRWAY “A” is for AIRWAY. It is normal for an infant to take s hallow and rapid breaths, so carefully look, listen and feel for breathing. If you cannot detect any signs of breathing, the tongue may be obstructing the infant’s airway. Although the head tilt/chin lift technique is similar to adults and children, when clearing an infant’s airway it’s important not to tilt the head too far back. An infant’s airway is extremely narrow and overextending the neck may actually close off the air passage. Tilt the head back into what is called the “sniffer’s position” – far enough to make the infant look as if he is sniffing (Figure 1). If the victim is still not breathing on his own, you will have to assist him breathing BREATHING “B” is for BREATHING. Cover the infant’s mouth and nose with your mouth creating a seal, and give a quick, gentle puff from your cheeks. Let the victim exhale on his own – watch his chest and listen and feel for breathing. If he does not breathe on his ow n, again place your mouth over his mouth and nose and give another small puff (Figure 1). If the infant remains unresponsive (no crying or moving), immediately check his circulation CIRCULATION “C” is for CIRCULATION. An infant’s pulse is checked at the brachial artery, which is located inside of the upper arm, between the elbow and the shoulder (Figure 1). Place two fingers on the brachial artery applying slight pressure for 3 to 5 seconds. If you do not feel a pulse within that time, then the infant’s heart is not beating, and you will need to perform chest compressions
PAGE – 6 ============
COMPRESSIONS An infant’s delicate ribcage is especially susceptible to damage if chest compressions are improperly performed, therefore it is important to use caution when rescuing an infant. Place three fingers in the center of the infant’s chest with the top finger on an imaginary line between the infant’s nipples. Raise the top finger up and compress with the bottom two fingers (Figure 1). The compression should be approximately to ½ the depth of the infant’s chest. Count aloud as you perform 5 cycles of 30 comp ressions and 2 breaths before checking the infant for breathing and pulse. REMEMBER TO DIAL 9 – 1 – 1. If there is no pulse, continue administering 30 compressions/2 breaths until an ambulance arrives. If at any point the infant regains a pulse but still do es not breathe on his own, give him one rescue breath every three seconds. Let’s review Infant CPR Review Infant CPR should be administered to any victim under the age of 12 months (except for newborns in the first hours after birth). The procedure is as follows: 1. Check for responsiveness by patting the infant’s shoulders or chest. 2. Remember your A – B – C: A as this may close off the airway. B reathing: cover the infant’s nose and mouth with your mouth and use gentle puffs, breathing from your cheeks, not your lungs. C irculation: check for pulse at the brachial artery, in the infant’s inside upper arm. If there is none, perform five compression s – 2 fingers (approximately ½ the size of a hand), 1/3 to 1/2 the depth of the infant’s chest. 3. Perform rescue efforts for 1 to 2 minutes before dialing 9 – 1 – 1. 4. Continue performing rescue efforts, checking for pulse every minute until help arrives. CPR Review ADULT (over 8 years of age) CHILD (12 months to 8 years) INFANT (up to 12 months ) Check For Responsiveness By shaking and shouting By shaking and shouting By patting feet and chest Dial 9 – 1 – 1 If unresponsive After 1 to 2 minutes of CPR After 1 to 2 minutes of CPR Pulse Location Carotid artery (neck) Carotid artery (neck) Brachial artery (arm) A irway Lift the neck and tilt the head back Lift the neck and tilt the head back Slightly tilt the head into “sniffer’s position” B reathing Pinch the nose; give 2 breaths Pinch the nose; give 2 breaths Mouth over mouth & nose; give 2 gentle puffs C irculation 2 hands, 2 inches; 30 compressions 1 hand, 1 inch; 30 compressions 2 fingers, ½ chest depth; 30 compressions CHECK FOR PULSE EVERY MINUTE. REPEAT A – B – C CYCLE AS NECESSARY UNTIL AMBULANCE ARRIVES.
PAGE – 8 ============
Burns A burn victim will require different type of care depending on the type and extent of his injury. Burns vary greatly from a common, fairly harmless sunburn to a potentially life – threatening 3rd degree burn caused by open flames or electrocution . Here’s how to distinguish the three different types of burn injuries and how to care for each: 1st degree burns are usually accompanied by redness and some swelling of the skin. Treat a minor burn by fir st cooling the affected area. If possible, keep the injury under cool running water for at least 10 minutes. If running water is not available place the burn in a container of cold water such as a bucket, tub or even a deep dish. Using a cool, wet compress made of clean cloth will also work if nothing else is available. Keeping the burn cool will reduce pain and minimize the swelling. If the injury is on the part of a body where jewelry or snug clothing is present, carefully remove them before it begins to swell. Apply a moisturizing lotion or Aloe Vera extract and dress the burnt area with loosely wrapped sterile gauze. 2nd degree burns will result in deeper, more intense redness of the skin as well as swelling and blistering. This type of burn should be treated just as a 1st degree burn but because the damage to the skin is more extensive, extra care should be taken to avoid infection and excessive scarring. Replace the dressing daily and keep the wound clean. If a blister brea ks use mild soap and warm water to rinse the area. Apply antibiotic cream such as Neosporin to prevent infection before redressing in sterile gauze. 3 rd degree burns may appear and feel deceptively harmless as the victim may not feel much pain due to com plete destruction of all layers of skin and tissue as well as nerve endings. The damaged area may appear charred or ash – color and will instantly start to blister or “peel”. If the victim’s clothing is on fire, douse him with non – flammable liquid. Dial 9 – 1 – 1. Do not remove burnt clothing from the victim as this will expose open wounds to the elements and potential infection. If possible, cover the victim’s injuries with wet sterile cloth to reduce the pain and swelling. If you notice that the victim is goin g into shock and loses consciousness, you will need to perform CPR . Choking Choking is usually caused by a piece of foreign matter such as food becoming lodged in a person’s windpipe. Because a choking victim is fully aware that he cannot breathe normally, a sense of panic may overcome them, making assessing the situation and resc ue efforts difficult. It is important to try and keep the victim calm in order to determine whether your assistance is truly necessary or if the victim’s own coughing reflex is sufficient. Start by asking the person if he is choking. This simple step can be deceptively effective – the victim may be coughing violently or even gasping for air, but if he is able to answer then he is probably not choking. A choking victim will not be able to speak since oxygen cannot reach his lungs. But if after asking the pe rson if he’s choking all he can do is gesture or point to his throat and you notice his face starting to turn blue, then he is most likely choking and you will need to perform the Heimlich Maneuver immediately. Start by finding the proper stance – behind the victim with one of your feet planted firmly between the victim’s feet. Wrap one of your arms around the victim and place your hand in a closed fist just slightly above his belly button. Place your other hand directly on top of the first. Squeeze the victim’s abdomen in quick upward thrusts as many times as it is necessary to dislodge the object in his windpipe. If you fail to clear the victim’s air passage, dial 9 – 1 – 1 immediately and continue to perform the Heimlich Maneuver until help arrives.
PAGE – 9 ============
Cu ts & Scrapes The first and possibly most important step when treating minor cuts and scrapes is to thoroughly clean the wound with mild anti – bacterial soap and water. You can use sterilized tweezers to remove any debris that remains embedded in the wound a fter rinsing. This will reduce the risk of an infection and possible complications. If the debris is abundant or can’t be removed for some other reason, a trip to the emergency room will be necessary. Water may induce bleeding by thinning the blood. If w hile rinsing the wound you notice increased blood flow, use gauze or a clean cloth to apply gentle, continuous pressure until the blood clots. Although hydrogen peroxide is commonly used as a disinfectant for minor cuts and scrapes, it is actually not very effective and may even delay the healing process by irritating a person’s living cells. You can use hydrogen peroxide but apply it around the open wound, not directly to it. An antibiotic ointment such as Neosporin is a better alternative – it will keep the wound from getting infected and speed up the healing process. Dress the wound with a bandage or sterile gauze to keep dirt and bacteria ou t. Change the dressing frequently and rinse the wound as often as necessary to keep it free of dirt. Continue to monitor the wound for several days. If the injured area turns red or puffy, or if excessive pain persists, then it may’ve become infected and will require a physician’s attention. Do not simply dismiss cuts as minor injuries as some may be quite serious if not tended to by a professional. If the wound is very deep or the bleeding is profuse, it may require stitches in order to heal properly. Electrical Shock Electricity travels through conductors – any material which allows electrical flow – as it tries to reach the ground. Because people make excellent conductors, minor electic shock is a common household hazard. Fortunately it is usually more surprising than dangerous and does not require medical attention. However, some basic precautions should be taken to insure that the shock does not interfere with the body’s normal electri cal impulses including the functions of the brain and the heart. Prolonged exposure to a direct source of electricity can also cause severe burns to the skin and the tissue. In the event of electric shock do NOT rush to assist the victim until you are cer tain that he is no longer in contact with electricity. Otherwise the current will pass through the victim directly to you. If at all possible, turn off the source of electricity (i.e. light switch, circuit breaker, etc.) If this is not an option, use non – conductive material such as plastic or dry wood to separate the source of electricity from the victim. If the injuries appear serious or extensive, dial 9 – 1 – 1. Check the victim’s vitals signs such as the depth of his breathing and regularity of his heart beat. If either one is effected by exposure to electricity or if the victim is unconscious, begin to perform CPR . Treat any areas of the victim’s body that may’ve sustained burns . If the victim is responsive and does not appear seriously injured but looks pale or faint, he may be at risk of going into shock. Gently lay him down with his head slightly lower than his chest and his feet elevated. Fractu res A fracture (broken bone) may not always be obvious as most breaks do not result in compound fractures (bone protruding through the skin). It is important not to misdiagnose a break and mistake it for a bruise or sprain. Typical symptoms of a fracture are: Immediate and excessive swelling Injured area appears deformed The farthest point of the injured limb turns blue or is numb to the touch Even slight movement or contact to the injured area cause s excessive pain
PAGE – 10 ============
Dial 9 – 1 – 1 immediately and immobilize the broken bone with a splint. A functional splint can be made of almost any material (wood, plastic, etc.) as long as it is rigid and is longer than the broken bone. To apply the splint simply lay it along the broken bone and wrap it against the limb with gauze or a length of cloth, starting at a point farthest from the body. Do not wrap it too tight as this may cut off blood flow. If the break is in the forearm, loosely wrap a magazine or a thick newspaper around the break and use a sling fashioned from gauze or a strip of cloth to keep the elbow immobilized. A break in the lower part of the leg requires two splints, one on each side of the leg (or at least the shin). If suitable material is not available, you can u se the victim’s healthy leg as a makeshift splint. As much as possible, keep the victim from moving and until an ambulance arrives, remember ICE : “I” is for ice – if possible apply an ice pack or ice cubes to the injured area. This will keep down the swe lling and reduce pain. “C” is for compression – if the wound is bleeding, apply direct pressure with a clean cloth to reduce blood flow. “E” is for elevation – try to keep the injured area as high above heart level as possible. This will reduce blood flo w to the injury and minimize swelling. Head Injury Although most minor head injuries caused by a fall or a strike to the head may result in a bruise or a bump and are not dangerous, it is extremely important to pay close attention to the following symptoms: Excessive bleeding from an open wound Loss of consciousness Interruption of breathing Prolonged disorientation or apparent memory loss If yo u detect any of the above, the victim may have sustained serious head trauma and will require professional medical attention. If that’s the case, dial 9 – 1 – 1 immediately. Until the ambulance arrives: If possible, place the victim in a dim, quiet area. Lay the victim down with his head and shoulders slightly elevated. If the wound is bleeding, dress it with gauze or clean cloth. Do not leave the victim unattended. If the victim loses consciousness, you may need to perform CPR . If the injury does not appear serious or extend beyond minor bruising , i t should be treated accordingly. Nosebleed A human nose is rich with small fragile blood vessels which are susceptible to damage. A nosebleed may be caused by a fall, a strike to the nose, or even from breathing excessively dry air. If the nosebleed is not a symptom of a more serious injury, it is rarely dangerous and can usually be stopped by applying continuous pressure. Do NOT tilt the victim’s head backward. Have the victim sit or stand upright to slow down the flow of blood. Loosen any tight clothing around the victim’s neck. If possible, have the victim spit out excess saliva – swallowing may disturb the clot and cause nausea. Pinch the nostrils shut and press the tip of the nose against the bones of the face. Maintain pressure for 5 to 10 minutes. Once the bleeding has stopped, the vic tim should avoid blowing his nose or otherwise straining himself for at least an hour. If the victim’s nose continues to bleed or if the blood flow appears to be excessive, or if the victim feels weak or faint, the damage may be more serious than it appears. You should call 9 – 1 – 1 or take him to the nearest emergency room as soon as possible.
PAGE – 11 ============
Puncture Wound Unlike a cut , a puncture wound does not typically result in profuse or excessive bleeding and although painful, may look harmless as the skin around the wound simply closes. But puncture wounds carry a risk of infection and if left unattended can result in serious complications. Injuries sustained by stepping on a nail that punctures through a sh oe are especially prone to infection. If the injury is caused by stepping on a nail or a shard of glass that’s been exposed to the elements, it is a good idea to consult a physician who may recommend a tetanus shot or booster. A bite from a household pet or another person that results in a puncture wound should be considered and treated as serious injury. If the bleeding is heavy or the item that caused the wound appears unsanitary, thoroughly clean the injured area with mild anti – bacterial soap and water and seek professional medical assistance as soon as possible. If the injury is minor, clean it with soap and water and apply an antibiotic ointment such as Neosporin to prevent infection. Dress the wound with sterile bandage and replace the dressing frequently. It is prudent to keep a close eye on the wound for several days to prevent an onset of an infection from any debris that may’ve lodged itself deep in the wound. If you notice persistent rednes s or puffiness or if the wound starts to ooze pus, have the victim consult a doctor right away. Now that you are familiar with CPR and First Aid, please go to the webpage and follow the steps to take a quick quiz: http://ucanr.org/sites/SJC_4H/Events_and_Calendar/4 – H_Camp/Camp_Staff_Information/
162 KB – 11 Pages