to light a number of magical braziers, all of which once protected the crypts of Kelemvor. undead creature that starts its turn within the brazier’s.
635 KB – 15 Pages
PAGE – 1 ============
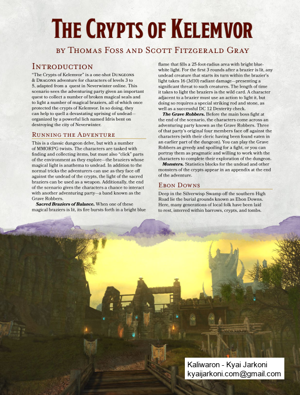
˜˚˛˝˙ˆˇ˘˛˙˚ fiThe Crypts of Kelemvorfl is a one-shot adventure for characters of levels 3 to 5, adapted from a quest in Neverwinter online. This scenario sees the adventuring party given an important quest to collect a number of broken magical seals and to light a number of magical braziers, all of which once protected the crypts of Kelemvor. In so doing, they can help to quell a devastating uprising of undeadŠ organized by a powerful lich named Idris bent on destroying the city of Neverwinter. ˇ˚˚˚ˆ˚˛ˇ˝ This is a classic dungeon delve, but with a number of MMORPG twists. The characters are tasked with of the environment as they exploreŠthe braziers whose magical light is anathema to undead. In addition to the against the undead of the crypts, the light of the sacred braziers can be used as a weapon. Additionally, the end of the scenario gives the characters a chance to interact with another adventuring partyŠa band known as the Grave Robbers. Sacred Braziers of Balance. When one of these ˜The Crypts of Kelemvor ˙˙˚˘˙˛˛˝ undead creature that starts its turn within the brazier™s light takes 16 (3d10) radiant damageŠpresenting a it takes to light the braziers is the wild card. A character adjacent to a brazier must use an action to light it, but doing so requires a special striking rod and stone, as The Grave Robbers. the end of the scenario, the characters come across an adventuring party known as the Grave Robbers. Three characters (with their cleric having been found eaten in an earlier part of the dungeon). You can play the Grave portray them as pragmatic and willing to work with the characters to complete their exploration of the dungeon. Monsters. Statistics blocks for the undead and other monsters of the crypts appear in an appendix at the end of the adventure. ˙˙˚ Road lie the burial grounds known as Ebon Downs. to rest, interred within barrows, crypts, and tombs.
PAGE – 2 ============
The villagers of Grimhollow have watched over these grounds for many years, with each generation passing on the duties to their children. Under their watchful eyes, the Ebon Downs have seen peace. But one night, that peace was shattered forever. Whether due to a lapse in Grimhollow™s vigil or some unknown power, the dead rose in force from the burial grounds and attacked the village, overwhelming its citizens. Those few lucky enough to escape spoke of a dark magic that caused those killed in the attack to rise as undead almost as soon as the life had left their bodies. The only thing left standing as a beacon of hope in Ebon Downs is the rundown fortress-temple of KelemvorŠa literal wall dividing the now-swamp- encroached village from the great barrows and the dead, making sure they don™t rise. The doomguides, clerics, and paladins dedicated to the god of the dead have pledged their lives in restoring the balance of Ebon Downs. But they are fewer and fewer every day, and have begun to call out across Faerûn for help. ˆ˚˛ˇ˝˙˙ If you want to play fiThe Crypts of Kelemvorfl as a side trek in a larger adventure, you can look for ways to tie the quest into that adventure. Whatever way you customize it, the characters are approached by an acolyte of Kelemvor petitioning for aid to the temple. travel and foodŠand the promise of burial if things go badly. But of more interest to adventurers is the acolyte™s promise that any gems, magic, or other wealth found within the crypts can be kept, since the dead no longer need such things. ˚˝“˛ ’˙˝ When the players are ready to begin the adventure, read or paraphrase the following. As you enter what is left of the rundown temple of Kelemvor, you feel a strange wave of warmth pass through your body. Any cleric or paladin in the party will recognize that the characters have just passed through a protective ward of some kind. The temple is small, and is missing part of its roof and one wall. A priest of Kelemvor tiredly stands watch, looking out over the barrows beyond, and an armored The cleric looks forlorn until he sees you, at which point his smile brightens and he beckons you over to him. He introduces himself as Doomguide SoulhearthŠthe one who sent out the request for aid. Soulhearth is not the most talkative person, and he gets straight to the point. fiThis temple of Kelemvor, our fortress, is our stronghold against the lich Idris and its army of undead. But it is not as secure as it should be. Grave robbers have broken into the crypts beneath the temple, and have broken several of the mystical seals that ensure those who are buried there remain at rest. fiI need you to enter the crypt, relight the sacred braziers that will destroy the undead, and bring back the broken seals. I can then repair them, while the holy entering the crypt.fl By accepting Doomguide Soulhearth™s quest, the characters will help resanctify the crypts beneath the shrine of Kelemvor. Their goal is to collect all the broken seals and to relight all the braziers found in the crypts. ˚
PAGE – 3 ============
˛ˇ˝˝“˛ The crypts of Kelemvor are on three levels, broken out into separate chambers and hallways. All levels are connected by stairs, and the areas of each level are separated by portcullis gates and stone doors. The key objects in the crypts are the statues of Kelemvor that once held the magic seals (currently broken), the braziers of balance , and lots of sarcophagi. Broken Seals. Each of the broken seals that the characters must collect is a piece of carved marble scribed with the symbol of Kelemvor, and weighing about 4 pounds. All the seals were once held by statues of Kelemvor scattered around the crypts. Doors and Gates. The areas of the crypts are separated by either iron portcullis gates or stone doors. The portcullis gates allow characters to see through them into the areas beyond. Most doors and gates are opened magically using levers on the fifront sidefl of the door, closest to the entrance to the dungeon. This design from the outside if needed. Pulling a lever to raise or lower a door or gate is an action. Once open, a door or gate stays open until the lever is pulled again, or unless a door closes automatically as a security measure. If the characters are worried about someone closing the doors behind them, an open door can be held open by wedging a spike or similar object between it and the adjacent wall with noted, a door that has been closed can be forced open opened with a knock spell or similar magic. All portcullis gates in the crypts creak and grind loudly when raised. The stone doors open with a loud scraping sound. Ceilings. Unless otherwise indicated, corridors and rooms in the crypts have ten-foot-high ceilings. Light. magical torches imbued with . In other areas (including both the lower levels), there is no light except what the characters bring with them. Sarcophagi. Numerous stone sarcophagi are set throughout the crypts. Unless otherwise indicated, all are closed. Any closed sarcophagus can be opened with moldering bones. ˛
PAGE – 4 ============
˝˚˛˝˝ When the characters enter the crypts, read or paraphrase the following. A steep set of stairs leads sixty feet down to the east of the temple, to a wooden door where a Kelemvorite priest waits. He unlocks the door and beckons you through, handing over a small candle lantern, a heavy striking stone, and a steel rod the size of a large dagger. fiOnly the spark of this rod and stone can light the braziers of balance ,fl he says dutifully. fiMay Kelemvor and Selûne protect you.fl The door shuts loudly behind you as the last of your group passes through it, and the sound of the lock being turned on the other side is ominous. You stand in a short hallway. To the south, a thick metal portcullis gate is rusted shut, showing only a dark corridor beyond. To the north, the hallway opens up into a small room. suggests that this area was once a guard post of holds treasure left behind by a priest who once stood guard here. A large stone door with no handles stands to the north, with a large brass lever on the wall beside it. When the lever is pulled, a disturbingly loud scraping sound rings out. Dust billows as the thick stone door slides upward, revealing the area beyond. A magical torch around the corner of the hallway lights the way forward. ˇ potion of healing that has the scent of brandy. ˝˚˛˝˚˛˝˘˛˙˚ Two doors and an open corridor give the characters a choice of directions from this area. Two doors stand ahead of youŠa metal portcullis gate to the west, and a stone door straight ahead to the north. Looking through the portcullis, another corridor extends some twenty feet before making a T-intersection. A brass lever stands beside the portcullis on the west wall. Where the passageway opens up to the east, it reveals both a larger room ahead and a statue of the god Kelemvor, its hands open as if it were holding the statue™s feet. Opposite the statue is a small alcove set with a pile of humanoid bones. Pulling the lever raises the creaking portcullis, but there is no sign of a mechanism for the stone door. No action or magic available to the characters can open the door, and any ability checks made to search or open it result in failure. (This door opens automatically after the characters turn a special key in area 8.) The bones are the remnants of undead skeletons destroyed by the Grave Robbers when they recently passed this way. Broken Seal. The piece of carved marble at the feet of ˝˝“˛ This huge chamber is supported by arched pillars, and features a ceiling ten feet high. Three ornate sarcophagi stand along the far wall, one of which has had its lid with magical light, revealing open doors along the north and south walls. In the center of the room, a waist-high marble brazier is carved with the symbol of KelemvorŠand has a mutilated body sprawled before it. Wood is stacked and ready for lighting within the brazier, suggesting that the body might have been an acolyte attempting to light it. A With a successful DC 13 Wisdom (Perception) check, a the shadowed spaces between the sarcophagi. ˝
PAGE – 5 ============
…˙˝ˆ As soon as any character moves past the pillars closest to the doorway, eight zombies rise up from the shadows and attack. For a 4th-level party, use eleven zombies. The players should instinctively recognize that this is a potentially overwhelming group of foesŠand should remember that focusing on lighting the brazier will aid The zombies are not smart enough to recognize the destructive potential of the brazier, and they attempt to ˙˙˝ Stone doors lead into areas 4 and 5, both of them already raised. Each door has a lever beside it that can be used to lower and raise it. ˇ The characters can claim the spell scroll of prayer of healing dropped by the acolyte. Additionally, a search of the acolyte™s body reveals an additional striking stone and steel rod, letting two characters attempt to light a brazier at the same time. ˝˝““˙ Pressure plates (marked as triangles on the map) and a nonfunctioning trap in this room are not a threat, but should hopefully make the characters nervous as they explore. There is nothing of value in this room. This small chamber features a single sarcophagus, more ornate than those seen in the larger crypt. A destroyed zombie is sprawled at the foot of the sarcophagus, its splintered skull all but removed by some massive object. In front of you, you see that objectŠa spear coming out of one of two holes in the wall, which must have once been part of a trap guarding this area. ˝˙ This chamber features ornately carved bas reliefs along the walls, showing the symbol of Kelemvor alongside magical inscriptions. The same inscriptions cover a sarcophagus against the far wall, which is far more ornate than those seen in the main crypt. The sarcophagus is set with large red gems just beneath its lid. A spell or similar magic reveals the presence of warding and binding spells within the chamber. If any character touches the sarcophagus, its lid sarcophagus must succeed on a DC 14 Dexterity saving throw or take 3 (1d6) bludgeoning damage and be ˙
PAGE – 6 ============
ƒ˛˛˘ wight in gleaming knight™s armor stands up within and leaps to the attack. At the same time, the room™s magical wards the door to slam shut unless it has been spiked open. The wight is weakened by the warding spells in the room, imposing disadvantage on its attack rolls. The or 35 hit points for a 4th-level party. Give it full hit points if facing a 5th-level party. ˝ˆ The magical wards are a boon to the characters, but their pulsing light can be distracting. Any creature that starts its turn in the room must succeed on a DC 10 Intelligence saving throw or have disadvantage on attack rolls until the start of its next turn. ˚˛˙˙˝ Any character standing in the entrance to this area when the door falls must decide which side of the door to move to. The character must also succeed on a DC damage and be knocked prone. Any characters left in area 3 when the door falls the characters are in area 5, the door can be opened manually (see fiFeatures of the Crypts,fl above). (Investigation) check can be made to examine the door mechanism and locate a hidden latch that opens the door from inside. This check cannot be made in combat. ˇ The sarcophagus is set with four large sardonyx gemstones worth 10 gp each, all of which can easily be pried out. ˝˙ˇ˙˙˝ An intersection of corridors features two stone doors with a lever between them, a sarcophagus in an alcove, and a statue of Kelemvor with a broken seal in its hands. Nothing hinders the characters from easily claiming this opens both doors simultaneously, revealing the entrance whose occupants are not happy to be disturbed. “ˆˇ˚˛ The side chamber is the nest of three giant wolf spiders , all of which attack at once. For a 4th-level party, give each spider 18 hit points. For a 5th-level party, give If any spider is reduced to 5 or fewer hit points, it scrambles to the back of the side chamber and disappears up one of several rough, narrow tunnels leading to the creatures™ hunting grounds on the surface. ˇ Any search of the webs in the spiders™ nest uncovers a a silver handle and a tooled silver scabbard, probably of ˝ˆ˝“˛ A statue of Kelemvor with a broken seal at its feet stands along the east wall, while a brazier stands along the west wall. A tattered banner bearing the symbol of Kelemvor hangs on the wall above the brazier. Four ornate stone sarcophagi stand in the corners of the room, and in an alcove near the entrance. The sarcophagus in the far corner appears to have been broken in half. A successful DC 15 Wisdom (Perception) check reveals movement within the broken sarcophagus. ˚…˙ When any character moves more than halfway into the room, an enraged zombie leaps out of the broken sarcophagus, howling in hunger and racing toward the characters. Use the statistics of an ogre zombie for this more advanced foe, but the zombie is a Medium creature. For ˆ
PAGE – 8 ============
as much damage on a successful save. A character searching the stairs and the dais notes the trap with a successful DC 13 Wisdom (Perception) check, and can easily step around it. A character climbing the stairs without searching spots the trap only if his or her passive Perception is 18 or higher. A character climbing the stairs at speed has no chance to spot the trap. „˚‘˙˝˛ˇ˚˛”˛˙˝ The body being feasted on by the zombies wears the armor and regalia of a cleric, but has been mutilated beyond recognition. (The characters can learn later that this is one of the Grave Robbers. The last one of the group to climb down into this area, he was killed when his climbing rope broke.) Any character searching the north end of the room notes a pile of broken tile and stone on the ground next to thirty feet of rope with a frayed end. A hole in the ceiling above the pile connects to a rough tunnel leading aboveground, and has a short length of frayed rope ˇ˝˚˚ underneath the bas relief of Kelemvor™s symbol, and cannot be removed. When any character turns the key, the scales in the bas relief magically right themselves, and the characters hear the faint sound of a stone door grinding open in the distance, back toward the entrance. (This is the means by which the characters gain entrance to area 9 and the levels below.) Turning the key back in the other direction puts the scales out of balance once more and closes the door into area 9. Otherwise, after one hour, the key magically turns back, the scales go out of balance once more, and the door to area 9 automatically closes. (The Grave Robbers knew of the key™s function before entering the chapel through the hole in the ceiling. They ˇ The dead cleric wears a breastplate in good condition, but it™s in bad need of cleaning. If the body is rolled vial in it, but the body™s weapons and pack are gone (quickly grabbed up by the Grave Robbers when they ˝˝˛˝ When the adventurers return to the central intersection will see that the stone door to the north has opened as a result. Beyond the door stands a small room with a lever next to another stone door, already open. Beyond that door, a set of steep stairs leads down into darkness. (Perception) check notes that the second door has been wedged with a spike to keep it open. The door from area the door magically closed. A successful DC 13 Wisdom (Perception) check discovers a hidden latch that opens ˘
PAGE – 9 ============
˝™˝ˆ The initial chamber of this area holds only a pair of stone columns, but a dark hallway leads north toward a T-intersection and an eastŒwest corridor. A successful DC 11 Wisdom (Perception) check notes a number of broken crossbow bolts around the southwest column and the southern wall of the initial chamber. †˝˙˝“ The north-leading hallway is set with a series of triangles appearing on the map. The plates are made of iron concealed under years of dust and rubble, and can be spotted with a DC 15 Wisdom (Perception) check. Characters not spotting the trap will step on the through holes in the north wall. Any characters in the hallway or the eastern part of the initial chamber have the trap™s four attacks randomly divided among them: +4 to hit, 5 (1d10) piercing damage. southwest column and the south wall if they don™t strike anyone. If the characters bypass the area and make it safely to the T-intersection, they can easily see the holes ‡˙˚˚ The eastern arm of the intersection leads to a collapsed section of hallway that can™t be dug out. To the west is a portcullis and a lever, with stairs seen just beyond. The portcullis is already open. Any check made to search it reveals that it is wedged with a spike so that it cannot be closed. ˝š˚˛˛˝ A set of stone stairs leads down to a landing, then turns to the north. From beyond the bend, a faint rise of
PAGE – 10 ============
An entry chamber at the bottom of the stairs features a statue holding a broken seal next to an open stone door. It can be easily noticed that the door is spiked open. Any character who reaches the base of the stairs and succeeds on a DC 11 Wisdom (Perception) check can hear distant voices. Voices from ahead are raised as if in argument, but are too far away for any details of the conversation to be heard. See the next area for more information. ˝˝ˆ˝ From the entry room of area 11, the characters will be able to see some of the details of this room through the open door, as you determine. in front of the door by a collapsed trapŠa spiked pit side. Narrow ledges to both sides look as though they should allow passage around the pit. Near the center of the twenty-foot-high chamber, a brazier of balance stands It takes a successful DC 10 Dexterity check to walk around the spiked pit. On a failed check, a character saving throw. With a successful save, the character manages to land between the spikes, taking only 3 (1d6) slashing damage from their edges. On a failed save, the character slams down onto the spikes and takes 10 (3d6) piercing damage. If any character falls into the pit, the Grave Robbers across the room (see below) hear it and come over to investigate. Adjust the following part of the encounter as necessary. ˝˙˝ When the characters have moved through the open door to see fully into the room, add the following details. On the far side of the room, an oversized stone door before the door and its lever, including one carrying an enormous sword. Their hushed argument carries across the room. check to hear the details of the argument between the adventurers known as the Grave Robbers. If none of the characters can hear the conversation, paraphrase the following action.
PAGE – 11 ============
fiYou going to be there all day? Or should I smash it open now?fl not a rogue. There are heavy wards and strong magic keeping this door sealed.fl fiSo you try, then,fl the warrior says to someone unseen. fiI told you, it™s a magic seal,fl a third voice says. fiNot my thing . . . Wait – what™s that?fl pillarŠan archer with bow drawn. fiWe have company,fl she calls to her companions. Whether spotting the characters™ light or hearing the sound of their movement, the Grave Robbers™ rogue becomes aware of the characters™ presence as they draw close. ˝˚˙Ł depending on whether the characters try to ally with the Grave Robbers, attempt to see them punished for their desecration of the crypts, or treat them as a direct threat and try to kill them outright. If the characters try to broker a deal with the group, use roleplaying and DC 14 Charisma (Persuasion) checks to determine their success. The Grave Robbers are opportunistic but honest, and are happy to work with the characters to get through to the next chamber in exchange for a fair split of any treasure found there. if they fail badly at persuasion or try to intimidate the NPCsŠthe three are a potent threat. If the characters want the Grave Robbers punished, the NPCs can be rendered unconscious if defeated, then tied up for delivery to Soulhearth when the adventure is done. ƒ˝ˆ˙˙˝ Pulling on the lever of the stone door in this chamber in place that hold the door shut. A spell (Arcana) check, reveals that two separate magical wards seal the door. The door can be forced open with a successful DC 30 Strength check, or its wards can be undone with two knock spells. A character who studies the door and succeeds on a DC 13 Intelligence (Investigation) check senses that its magic feeds into the room in some wayŠa clue that lighting the brazier also unseals the door™s magical locks. When the brazier is lit, a pulse of light at the door announces that the wards have been disabled. Pulling the lever then opens the door. ˇ they can claim their gear and treasureŠmundane weapons and armor, three potions of healing , coins and gems worth 45 gp, and one uncommon consumable magic item of your choice. ˝•˚˝“˛ A low-ceilinged chamber holds a statue of Kelemvor in the northeast corner, with a large chest before it and a broken seal at its feet. A single ornate sarcophagus stands to the west, with a dusty open book set on one of four small plinths that surround it. A dead body sprawls before the sarcophagus, whose sides are marked with seen in the previous crypts. With a successful DC 13 Intelligence (Arcana or sarcophagus™s inscriptions are Thayan in nature. A character with a background related to Thay knows this automatically. The book on the plinth is a dusty prayer book left here by the Kelemvorites, and worth 10 gp to a temple. The body is an acolyte who died in this place during an earlier rising of undead. ”˚‘ˇ˚ˆˆ A long-dead mage in the sarcophagus has been raised as a and woken from its undead slumber by the opening of the door into this area. Seeking attacks at once. If they do not, it casts lightning bolt (which it has prepared instead of ) to blast the sarcophagus open before it attacks. Any characters within 10 feet of the sarcophagus must succeed on a The Grave Robbers If the characters decide to take on the Grave Robbers, they Ł Samulkin Farcaster group, who uses bravado to hide when he feels that he™s in a bit over his head. Use illusionist stats for Samulkin.Ł Gromlik Three-Teeth is a heavily armored warrior with sword and shield. Most folk think he™s a dwarf, but no one really wants to ask. Use knight statistics for Gromlik.Ł Cailyassa Forgedawn is a half-elf rogue with a shortbowŠand a short temper. Use scout statistics for Cailyassa. Their experience and savvy make the Grave Robbers a challenge for even a 5th-level party. For lower-level characters, make the following adjustments to Samulkin™s Ł For a 3rd-level party, Samulkin has already expended his 3rd- and 4th-level spell slots and has only 19 hit points. Gromlik has only 26 hit points and cannot use his Leadership ability. Ł For a 4th-level party, Samulkin has already expended his 4th-level spell slot and has only 28 hit points. Gromlik has only 35 hit points.˜˜
635 KB – 15 Pages